
Quarantine project, chair edition

What does one do in quarantine, besides finally tackle the insane projects you have stored in your garage "for a rainy day" and then complete them and wonder, okay, when did I think I was going to have motivation for this besides in quarantine?
Anyway, say hello to our first completed quarantine project: reupholstering this lovely secondhand recliner we got from Starts with Vintage (on Instagram, but they also sell things on FB Marketplace if you're local to Omaha!). When we were nearing the end of the basement renovation (still no post yet, sorry, sorry!) we realized we were gonna need some more furniture to fill it out. So we grabbed this beautiful Plycraft chair, the set of yellow chairs in this post, and the one this post is dedicated to (pictured below) all for a lump sum.


It was insanely comfortable and a hidden recliner exactly like we'd wanted (no visible mechanism to recline for kids to mess with), but David didn't like the color of the original upholstery. It was also loosening in spots and needed either some deep cleaning or to be replaced. Therefore it sat in the garage like this for months. I got one quote to reupholster it for $485 (not including cost of fabric!!!) and decided we should give it a shot ourselves and then if it didn't turn out, we'd consider hiring a professional.

After digging for hours and hours on Modern Fabrics, we landed on a brown crossweave fabric (the brand of which is escaping me and it's kind of making me upset that I can't remember, but I think it was either DesignTex or Knoll). 5 yards came in the mail a few days later and we set to work taking the chair apart!

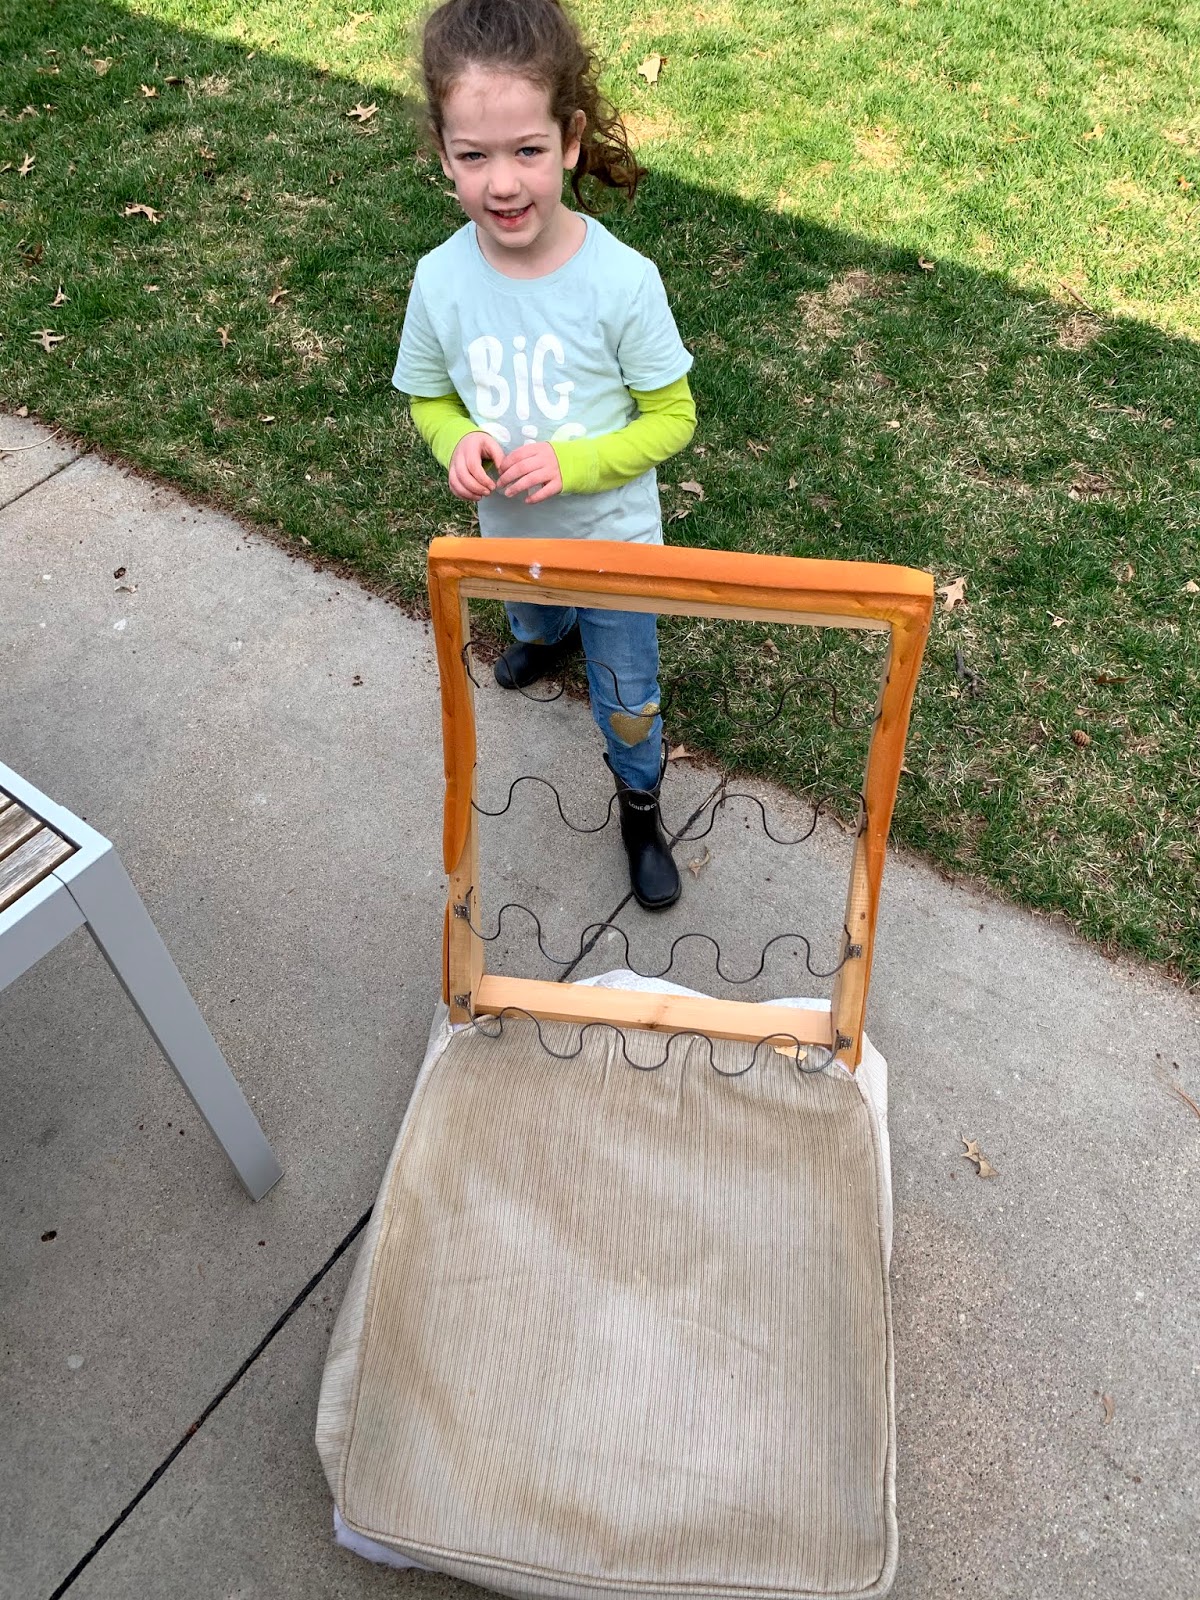
Turns out it is a Lay-Z-Boy chair, and I am also a lazy boy (girl) because I should go back and rotate that photo but I'm not going to, I trust in your ability to read the brand upside down if you don't believe my claim. It was...dirty. But that's okay!


It was pretty easy to get apart, just a little time consuming. The three pieces that made up the footrest were just screwed in from the bottom, and everything else was relatively self-explanatory and easy to get apart. We took a TON of photos to make sure we could put everything back together correctly, but I won't bore you with all of them in this post, especially since every chair is different and you kind of have to just go for it. :) Suffice it to say we had plenty of photos! We also kept all the pieces that came off the chair in close proximity to their fabrics, so we could just template off of them while cutting the new pieces.
After we got it all apart, which took maybe a total of 3 hours slowly spread out while watching The Office/putzing around (aka we definitely could have gotten it finished quicker), we started cutting the pieces of the new fabric and attaching it.

I promise I did *some* of the work on this chair, I really did! I just only have photos of David doing it because I'm always the one taking the photos. I do think you could probably do this on your own, but having a second set of hands to stretch and brain to think through is helpful in any new DIY endeavor, including upholstery.
As you can see in the photo above, we started with the seat fabric, added a new layer of batting (which I happened to have on hand from previous quilting projects) to the backrest since we didn't want to spend the effort and time replicating the buttons, and just used an electric staple gun to attach everything. The original chair had some piping on the edges but we also didn't want to bother (although we easily could have!), so we just ripped it out and pretended it wasn't there.
We also had some enthusiastic "help" in various forms...


Cute but not all that helpful. Most of the actual work happened after bedtime and on the weekends away from prying hands/parental safety violations.

This was our first upholstery project, so we were definitely learning on the job, but I do really feel it's an approachable task even with no experience. If you've got the patience to learn, a staple gun, and a sewing machine (for that one swing piece in the footrest on the edges), you can do this!
Ready for the after photos?


 |
| can you spy my Vanna White, helping hold the chair open? |

It's funny because in these photos, the right near the top of the cushion looks wonky but in person it's really not, so I'm not sure what's going on there. Perhaps it is a little too loose? Somewhat of an easy fix if it ever starts to bother us in person, since we know exactly how everything goes in and out of this chair and all we'd have to do is staple it tighter. :) And honestly, I think I could just push it in a little bit with my finger under that wooden brace piece but to actually "fix" it we'd have to take it apart. Again though it's weirdly not noticeable in person!
I really love side-by-side before and afters, so here you go!

Cost of project:
Fabric: $69.99 from Modern Fabrics
Stapler and staples: borrowed from David's parents, thanks Gokies!
Blood, sweat, and tears: free
Chair itself: approx. $100
Total: $170
Tell me what you've been tackling in quarantine between stress-eating and binge-watching on the couch for hours?? (Or is that just us?)
HG
Hannah, that looks so good!! I'm inspired!
ReplyDeleteI saw this on your instagram and I'm seriously SO impressed. Bravo!!!!
ReplyDelete